
To craft personalized wall art, start by selecting a color palette that reflects your style and complements your space, whether bold or muted tones. Use framing techniques to highlight key elements and create visual harmony across your pieces. Mix textures and shades to add depth and interest, and guarantee your artwork ties into your decor for a cohesive look. Keep experimenting with styles and materials—if you stick with these tips, you’ll discover how to create truly unique and meaningful pieces.
Key Takeaways
- Choose framing styles that complement your artwork and room decor to create a polished or relaxed aesthetic.
- Select and experiment with color palettes that reflect your personality and set the desired mood for each space.
- Incorporate textures and shades within your color choices to add depth and visual interest to your DIY wall art.
- Use framing techniques to emphasize focal points and guide viewers’ attention to specific elements of your pieces.
- Maintain consistency in framing and color schemes across multiple artworks for a cohesive and personalized wall display.
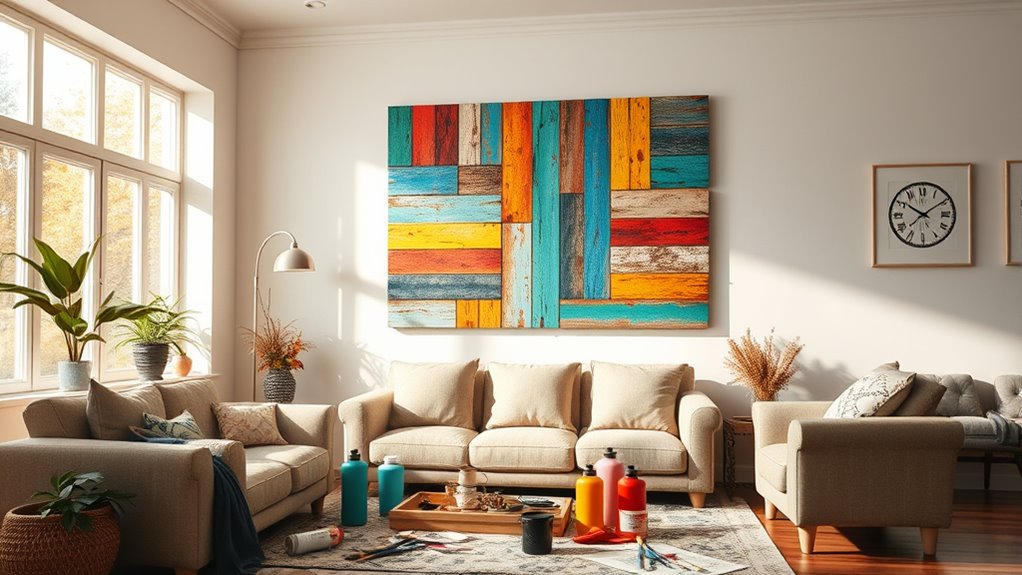
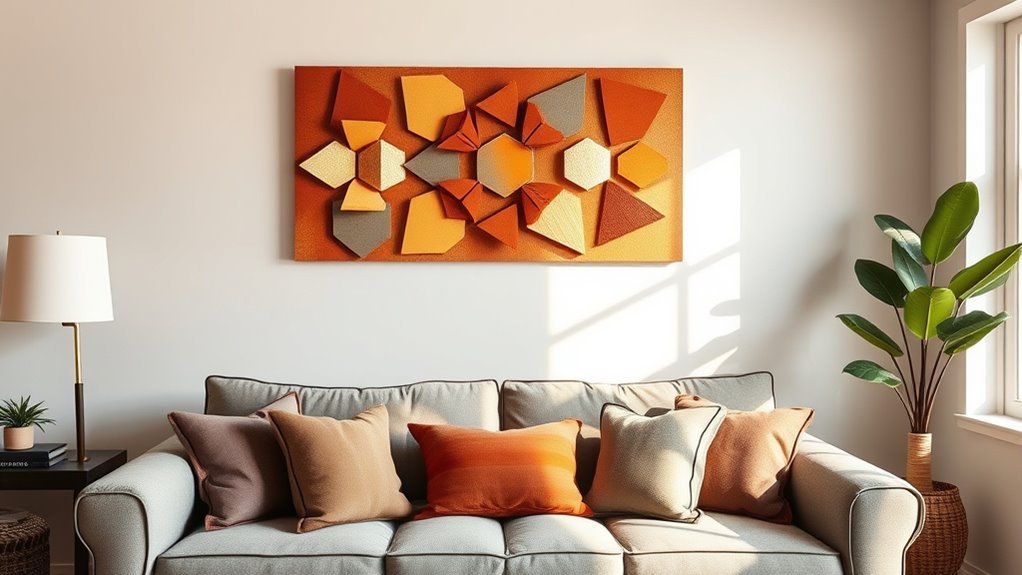
Creating your own wall art is a fun and budget-friendly way to personalize your space. When you start crafting your pieces, one of the most important aspects to consider is how you’ll frame your artwork. Framing techniques can dramatically influence the overall look and feel of your wall art, so it’s worth experimenting with different styles. For example, simple matting or sleek modern frames can give your work a polished, professional appearance, while raw edges or no frames at all lend a more relaxed and contemporary vibe. The key is to match your framing choices to your home’s decor and your personal style. If you’re aiming for a cohesive look, try using consistent framing techniques across a series of pieces, which helps create visual harmony. Additionally, think about how your framing can complement your chosen color palettes. Bright, vivid colors might pop more with minimalist, black frames, whereas softer pastel shades work beautifully with rustic or distressed wood finishes. The right pairing of framing techniques and color palettes elevates your DIY wall art from simple decorations to statement pieces.
When selecting your color palette, don’t be afraid to experiment. Your wall art should reflect your personality and set the mood of the room. If you want a calming atmosphere, opt for muted tones like blues, greys, or earth tones. For a lively, energetic space, go for bold, contrasting colors that draw the eye. Incorporate color palettes that tie into your existing decor to ensure your artwork complements the room rather than clashes with it. You can also create contrast by pairing neutral backgrounds with vibrant accents to make your artwork stand out. Mixing textures and shades within your palette adds depth and interest, making each piece more engaging. Remember, the beauty of DIY wall art is that you have complete control over every element. You can adjust colors and framing techniques until you achieve the look you envision, all while keeping costs low.
Don’t forget that framing techniques can also serve to emphasize certain elements of your artwork, guiding viewers’ attention and enhancing the overall aesthetic. As you craft your wall art, keep in mind that the process itself should be enjoyable. Use different framing techniques to see what feels right, and select color palettes that evoke the mood or style you want your space to convey. Whether you’re creating a bold statement piece or a subtle accent, blending your creative instincts with thoughtful framing and color choices ensures your DIY art will truly reflect your personality and enhance your home. The best part? Your personalized creations will leave a lasting impression on anyone who enters your space.
DIY wall art frames
As an affiliate, we earn on qualifying purchases.
As an affiliate, we earn on qualifying purchases.
Frequently Asked Questions
What Are Affordable Materials for DIY Wall Art Projects?
You can use budget-friendly supplies like canvas sheets, acrylic paints, and washi tapes for your DIY wall art projects. Inexpensive art mediums such as printable paper, fabric scraps, or even recycled materials like cardboard work well too. DIY projects don’t have to be costly; with these supplies, you can create personalized, stylish wall art without breaking the bank. Get creative and make your space uniquely yours, affordably.
How Can I Ensure My Wall Art Lasts Over Time?
Your wall art is like a cherished keepsake, so you want it to last. To guarantee its longevity, use preservation techniques like sealing with varnish or protective coatings, especially if you’ve used paint or paper. Choose durable materials like canvas, wood, or high-quality prints. Proper hanging and avoiding direct sunlight help prevent fading. Regularly dust and inspect your art, keeping it in good shape for years to come.
What Techniques Are Best for Framing Homemade Artwork?
You should choose framing styles that complement your artwork’s style and your decor. Use matting techniques to add depth and protect the piece; acid-free mats prevent damage over time. Opt for durable, high-quality frames, and consider UV-protective glass to shield your creation from sunlight. Properly securing the art with appropriate fasteners guarantees stability. These techniques enhance your homemade artwork’s appearance and longevity, making it a cherished part of your home.
How Do I Choose the Right Size for My Wall Art?
To choose the right size for your wall art, consider proportional scaling to make certain your piece fits well within the space. Think about the room’s dimensions and how the artwork will interact with other elements on the wall. Aim for visual balance by avoiding pieces that are too small or overwhelming. Measure carefully, and picture different sizes on your wall to see what feels harmonious and enhances your room’s overall aesthetic.
Are There Eco-Friendly Options for DIY Wall Decor?
Yes, you can definitely create eco-friendly DIY wall decor. Use recyclable materials like cardboard, glass, or reclaimed wood to reduce waste. Incorporate natural dyes from plants, berries, or spices for vibrant, non-toxic colors. Don’t worry about durability—many natural materials last well when properly sealed. This way, you enjoy beautiful, personalized art while being kind to the environment, making your space both stylish and sustainable.
canvas picture frames for DIY art
As an affiliate, we earn on qualifying purchases.
As an affiliate, we earn on qualifying purchases.
Conclusion
Now, imagine stepping into your home, greeted by walls that reflect your personality—vivid colors, textured patterns, and meaningful designs. Your DIY wall art becomes more than decor; it’s a masterpiece of your creativity, turning blank spaces into vibrant stories. With each brushstroke and carefully placed detail, you create a warm, inviting atmosphere where memories and artistry blend seamlessly. Your personalized touches transform your space into a cozy haven that truly feels like yours.
modern black photo frames
As an affiliate, we earn on qualifying purchases.
As an affiliate, we earn on qualifying purchases.
rustic wood picture frames
As an affiliate, we earn on qualifying purchases.
As an affiliate, we earn on qualifying purchases.